How to Manage Groupings
Your AMP pulse check or subscription includes five customizable filters that help you sort your data – such as location, department, and manager. Within these filters you can have as many sub-groups as you desire. For example, the filter for location could include all of the various locations for your company.
This page documents how to add these “sub-groupings” to your AMP database. Please note: You must have Administrator access to add or edit groupings.
How to Manage Groupings:
Step 1: Access the Manage Groups page
To access the Manage Groups page, click on the Manage Groups tab on the left.

Step 2: Managing Groupings
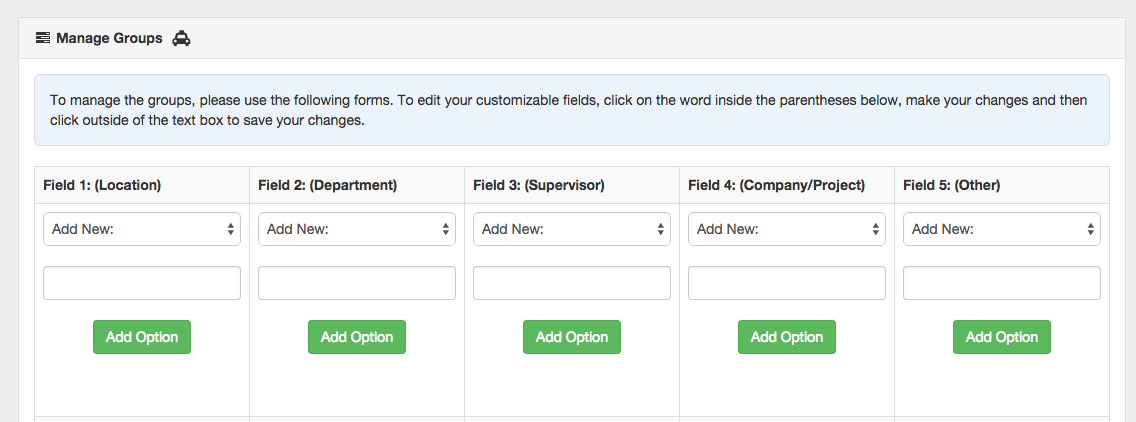
On this page, you can change grouping names, as well as add or modify grouping options.
Please note that any changes made on this page will be company-wide and will apply to all administrators.
Group Name
- To change the Custom Grouping Title, click on the title that is in parentheses. This will open a text box where you can edit the title. Once you’ve finished making your changes, click outside the text box to save.
Add/Modify Options
- To add a new grouping option, click “Add New” and enter the name in the box below.
- To modify a current grouping option, select the option that you would like to modify, make changes, and then click “Modify Option.”
- To delete an option, select the option that you would like to delete and then click “Delete Option.”