Automatic Reminders
Automatic Reminders Overview
The Automatic Reminders page has been designed to allow users to manage their automatic reminders that are sent to AMP participants. Administrators have the ability to add or edit the reminder that will be sent to the entire company, as well as having the option to set separate reminders based on the AMP filters. If AMP is being completed are part of an initiative with a start and end date in mind, this will allow the AMP Administrator to have reminders sent automatically to those users.
The automatic reminders are sent out at 7am EST based on the days selected when setting them up. They are sent to all users who are currently due or past due to complete their AMP assessment. Reminders will be sent to those users until they complete the AMP assessment or the automatic reminder is turned off.
How to Use the Automatic Reminders
Step 1: Access the Automatic Reminders Page
To access the Automatic Reminders page, select the Tools menu on the left. This will cause a drop-down to appear with various sub-menu options.

Select the Automatic Reminders link to access the page.
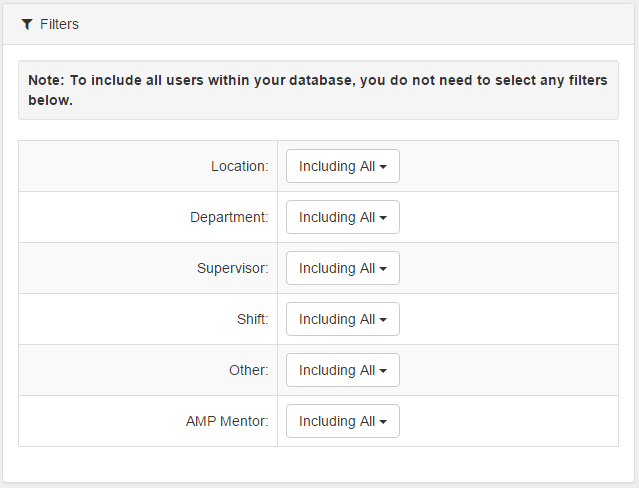
Step 2: Apply Filters
The filters available for the automatic reminders are the same filters setup throughout the AMP database (location, department, etc.). Select any of the filters you would like to have included in this automatic reminder, and everyone who is currently due to complete the AMP and setup under those filters will receive the email. To include all users within the AMP database, do not select any filters.
Step 3: Reminder Name
For description purposes, and to allow you to easily identify a reminder if you would like to edit it later, each automatic reminder can be given a specific name. For example, if you’re setting up a reminder to go only to your Sales Department, you could name it “Reminder for Sales Department.”

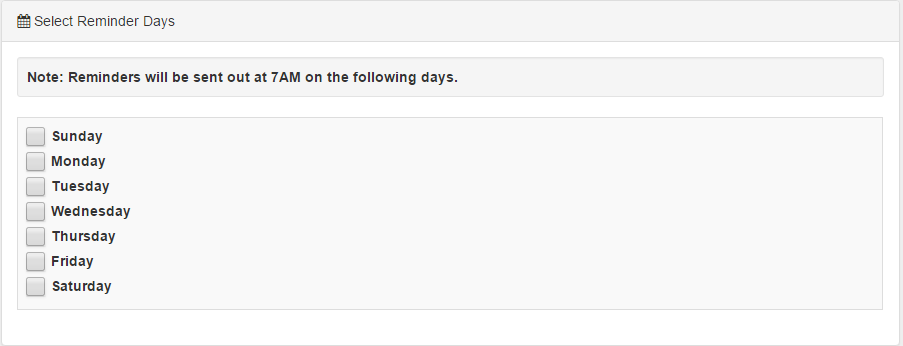
Step 4: Select Reminder Days
Reminders will be sent out at 7am EST on the days selected from the list in this box. Simply click on the checkbox beside the day or days you would like the reminders to be sent. There is no limit to the amount of days you would like the reminder to be sent, though we recommend no more than 2 days be selected.
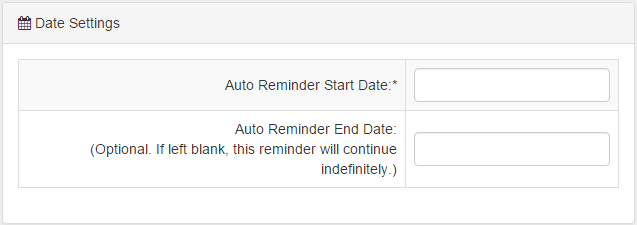
Step 5: Date Settings
Next, select a date you would like the automatic reminder to start being sent. You can also set an auto-reminder end date if you’re only setting the reminder for a specific time period. If the end date is left blank, the reminder will continue indefinitely.
Step 6: Final Settings
The final option is to enter the email address were you would like to have a delivery report be sent. This will send an email to the address in the box that details how many reminders were sent out, shows the email addresses they were sent to, and includes any email addresses that are invalid, meaning the reminder was not sent to them. This section is optional.

Once all fields have been filled out, make sure the drop-down beside active is set to “Yes” and click on Add Reminder. You will have the ability to test the reminder at the top of the page. This will show a list of names who will get the reminder, but no email will be sent.
![]()
Editing a Reminder
At the bottom of the page, you will be able to see all automatic reminders that have been setup. If the reminder is highlighted in green, it means that that reminder is currently active. If it’s highlighted in red, the reminder is currently inactive. This section shows you who created the reminder, the name given, start date, end date, last run date, days selected, and whether it’s active.
To edit the reminder, select the Edit button on the right of the screen beside the reminder you want to edit. Make your changes to the menus, and then select changes. You will again be able to test the reminder.
If you’re simply turning off the reminder, select the edit button, and then under the Delivery Information Report section, select “No” beside the active option. Once you save your changes, the reminder will no longer be active.